Sunday, 6 December 2020

Simple little handmade gifts, they just make me smile!

As I write this post from my comfy chair, I'm looking about my great room and my eyes drift to all the handmade items in the room.  The quilts, pillow, wool table toppers and stitched pictures....it just makes me smile.  

Those hand made items warm up the room and make me think back to when they were made or received with a smile.  Now more than ever, a simple project can spread those smiles and let someone know you were thinking of them.  It's like a virtual hug!

Over the years I have taught, I shared some simple little projects.  Not all projects shared were mine, so with credit was provided to the designer.  

Today I thought I would re-share some of these simple projects so you too could make someone smile this year.  

And when you deliver them, be safe and don't forget to "Ding and Dash"!  (Thanks to Michelle Peters of Watergirl Quilt Company for this catchy delivery method!)


From December 2017 - A simple Circle Mug Rug


Whilst I had seen this design on Pinterest, the link was missing so, giving full credit to the original designer, I drafted the instructions.

Download your copy of the instructions here:

Circle Mug Rug


From June 2016 - Raccoon Case

One of the easiest zippers to insert into a practical eyeglass case, pencil case or a case for small scissors.  You'll never want to sew in a two sided zipper into a small case!

http://blogg.pinkponydesign.com/2015/10/keep-your-sunglasses-safe-raccoon-case.html


From April 2016 - Quilt Block Design Board

We all have done it, laid out a block on our cutting mat and in the process of carrying it to our sewing machine, we flipped a piece, sewed a seam on the wrong side or....

Lori Holt had a solution for this in her Quilt Block Design Board

https://www.youtube.com/watch?v=uO-fosn6Yfs


Wednesday, 11 November 2020

A Day to be Thankful - Virtual Show and Tell

Our posts today were filled with images and words describing what we are thankful for, tonight was no different for me. 

It was also Virtual Show and Tell night.  

A group of Alberta and Arizona quilters gathered together on Zoom to share their work as part of our quilting community.  The banter at the beginning of the call as everyone said hello and shared the weather - from 70 degrees Fahrenheit of Mesa to minus 17 Celsius of Pincher Creek, alas no sympathy for Andi in Mesa.

At this time, I am spending my evenings doing big stitch quilting and have tried my hand at Siddi quilts.

The repetition of the big stitch quilting is very calming amidst the chaos around us.

The technique has also be described as Kawandi quilting.

I have a habit of throwing all my scraps from a project into a bucket.  Those buckets of sorted scraps are perfect for this technique.  

I layer a backing (pressed in 1/2" around the perimeter) with batting and then scraps which have seam allowances pressed under on two sides.  Layer around the perimeter, pin and then big stitch quilt in concentric 1/2" rectangles around the piece.  


For more details check out the Show and Tell link to the presentation from this evening.

Thank you to the ladies of my quilting community that made time to join us tonight.  

Show and Tell Nov 11, 2020


Tuesday, 27 October 2020

Borders Reference Page - A Tool for You

Borders on a quilt are not just for traditional quilts!

Often a border cut from the background fabric can make blocks look like they are floating on the quilt top.  

Take my Double Dash Quilt, there are borders of the background fabric around the double churn dash blocks.


Borders can make or break the size and shape of a quilt top.  Absent a measure, measure, measure and average technique for determining the length of a border can result in "wavy"borders.  A wavy border results in a quilt top that is anything but square.

Save yourself and perhaps your long armer some grief and take the time to apply this technique when adding borders to your quilt top. 

Download the Borders Reference Page from the link below for the next time you have to add borders to your quilt top.

Borders Reference Page


Saturday, 27 June 2020

Scrap Basket 2 - Step 11 Final Step

Inspired by a Tile

The inspriation for this block, came from an unusual place, the tile on the walls in the Vancouver airport bathroom.

Picture this, the tile has grabbed my attention.  I can't stop looking at the tile.  I don't have enough time to sketch out the block before I have to board my flight to Phoenix.  My family can't hold the boarding long enough for me to sketch as I was travelling alone this flight.  So snap, I did it.....I took a picture of the tile in the bathroom.  I quickly looked around, phew I was safe no one saw me snapping the picture.


Here is the picture.  Its not the greatest picture, but you can imagine the need for a quick snap!


Whilst this block is likely one of the easiest blocks in the quilt to piece, it is one of the hardest blocks to select fabrics to make it shine.


When I have taught this block before, I have
preselected some of the fabrics for the cuts and had chosen 2 - 4 fabrics for each of the remaining cuts.

Using the cameras on our phones, we auditioned the fabrics for the different cuts.  It was interesting to watch the debates over the fabrics and color choices.

Our quilting personalities sure came out.  It was great fun.


With this block, fabric selection and placement are key to creating movement.  Consider using:

  1. Large scale print
  2. Medium scale print
  3. Small scale print
  4. Geometric or striped variation
  5. Random dots.

Try the technique to select the fabrics for your blocks.  But, above all have fun!

This is the last block for the Scrap Basket 2 Quilt Along, just in time for the summer.  Don't forget to post your photos of your quilt on social media!

I started the first Scrap Basket Quilt Along January 18, 2020 and the Scrap Basket Quilt 2 Quilt Along launched April 18, 2020.  I hope you enjoyed these projects as we have navigated through our new normal.

Remember,  It's not about keeping busy, it's about being at "piece"!

Download the instructions for Step 11, the final step from the link below:

Scrap Basket 2 - Step 11 Final Step


1.   


Saturday, 20 June 2020

Scrap Basket 2 - Step 10

Sliced Square

After last week's marathon of 36 blocks, I have a simple 6 blocks to complete this week.  With this week's blocks, the 6 - 24 1/2" blocks can be sewn together.  We are then down to the last 6 blocks to complete the entire quilt on June 27th in time for our summer break.

Back to this week's block.

A simple pieced strip is all that it takes to make this block pop.  The inset 1/2" finished strip is simple when it is cut from a larger strip set.


Slicing the blocks for the inset strip are entirely random, creating more movement in the quilt.

You start with a 5" square, slice it up and inset the 1" solid strip with the dark solid square of

This block would be great for an entire quilt of 5" squares of scrap fabrics.  Consider insetting a black on white slice with a black solid square to bring it all together.

Consider this block as the reward for all the sewing last week's 36 blocks.


Here is a shot of two of my 24 1/2" blocks I completed this week.

We are in the home stretch!

Download the instructions for Step 10 from the link below:

Scrap Basket 2 - Step 10


Saturday, 13 June 2020

Scrap Basket 2 - Step 9

Square in a Square

Simple solids surround an offset print centre square in this classic block.  We have our work cut out for us this week, as there are 36 square in a square block in the quilt.

The use of solids can have a calming effect in a busy quilt as they provide a place for our eyes to rest.

Square in a square blocks can be a challenge to keep the points on the offset square.

In this block our centre square is 3 3/8".  This odd sized square will take a bit of time, and glasses to cut.

A couple of simple tips can assist with ensuring you have a full 1/4" seam allowance at the points for the centre square.

The first tip:  It all starts with a larger triangles for the sides of the centre square.  You start with a    3 1/4" solid square at and cut it in half along the diagonal.

These triangles will be a fair bit larger than the centre square.  You will have "dog ears" over 1/4" beyond the edge of the centre square.  Ensure the long side of the triangle is centred on the side of the centre square.

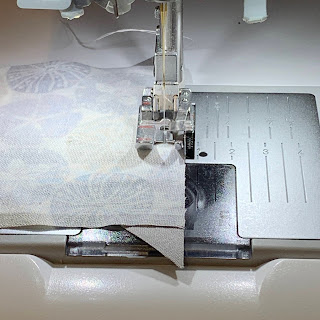
The second tip:  When you sew the long side of the triangles on to the centre square, have the centre square on the top as per the photo at right.

If you are like me, my natural tendency would be to have the triangle on the top when you sew the seam.  However, this contributes to less than accurate block.

Why?

It's hard to sew an accurate 1/4" seam along the centre square if you can't see it.

Third Tip: Before you press the triangle away from the centre square, run your fingernail along the seam to flatten the seam.  Press and lightly starch.  My go to starch is the Acorn Easy Press Pen.  This pen doesn't over wet the block.  Over wet blocks tend to ripple as opposed to lying flat.

Once sewn, the block will be oversized.  A slightly oversized block can be trimmed to an accurate 4 1/2" square.

You will get a lot of practice making this block, by the time you complete the 36th block you will have perfected this technique!

Download the instructions for Step 9 from the link below:

Scrap Basket 2 - Step 9


Saturday, 6 June 2020

Scrap Basket 2 - Step 8

Simple Strip

One of my favourite technique's is strip piecing.  I've been know to study a block and see if I can rework the instructions so that I can strip piece a block instead of sewing smaller squares of fabric.  This week's block is simply two different strip sets.

The strip sets are constructed slightly longer so you can "clean" up the left side of the strip sets before cutting the 2 1/2" strips.

Even when we align strips carefully, we still can end up with the left edge being that are off about 1/16" to 1/8".

A couple of years ago, I participated in the Tula Pink's 100 Blocks in a 100 days challenge.  There were squares in the various blocks that were cut as small as 1".  I don't enjoy piecing those little squares.  I can get a far more accurate block if I strip piece those small squares. You can bet that I studied those Tula blocks to see if I could construct the blocks in strip sets.


After looking at the secondary patterns produced with last week's block, curiosity got the best of me and again what would happen if....

 I tried the same partial piecing block with this week's block and the layout at right was the result.

There are 6 Simple Strip blocks in the quilt.

Download the instructions for Step 8 from the link below:

Scrap Basket 2 - Step 8


Saturday, 30 May 2020

Scrap Basket 2 - Step 7

Simple Twist

Sometimes, it is the simplest of blocks that add visual interest to a quilt.  This week's block is well suited for leftover 2 1/2" strips.  It all starts with a 2 1/2" x 8 1/2" strip and 2 1/2" square of a light fabric and a 2 1/2" x 8 1/2" strip and 2 1/2" square of a medium or dark fabric.


The block is constructed with a simple flip and fold medium square on to the top left corner of the light strip.

Repeat with the light square on the top left corner of the medium strip.

The key to the flip and fold squares is ensuring your stitching line is two threads to the left of the diagonal line drawn on the 2 1/2" square.

In the past few weeks, I have researching techniques for increasing the accuracy of quilt blocks.

Flip and fold corners are really susceptible to distortion when they are pressed.

Try pressing the seam by dragging a fingernail along the seam before you bring out the iron. Whilst I have finger pressed seams before, using my fingernail along the front side of the seam to "press" a seam before you iron the seam really works well to flatten the seam without stretching the block.  Give it a try.


Simple blocks also lend themselves to secondary patterns.  With the blocks on my worktable, I wondered what would happen if,.... and the result was the block right.

There are 6 Simple Twist blocks in the quilt.

Download the instructions for Step 7 from the link below:

Scrap Basket 2 - Step 7


Saturday, 23 May 2020

Scrap Basket 2 - Step 6

Switch it Up!

Take two blocks, slice them in quarters and switch two quarters and we have an even more interesting block.  To end up with either a 1" or 2" squares in the centre of the block we need to upsize our starting blocks to allow for the seam allowances.

Start with a 5" centre square and surround it with 1" strips and follow up with 2"strips.  The challenge with this block is piecing and pressing the 1" strips around the centre square.

Whilst it would seem to be simple, an over or undersized seam allowance is even more noticeable when you are sewing 1" strips.

Ensure you don't veer off the 1/4" seam allowance at the beginning and the end of the strip.  Refer to my April 4th post for more information on "veering off" our seams.

Save yourself some "unsewing" and check your seam allowances before your sew the 1" strips.


Once sewn, take care not to distort the 1" strips with your pressing.  A careful finger press before pressing with your iron, will help to reduce distortion of this small strip.


Apply a light touch of starch from an Acorn Easy Press Pen to help the strips lie flat before you add the next strip.  Don't overwet the block with starch.

The distortion of the 1" strips will be more noticeable in the the corners of the block.

Pair the first block with a block with a 3" centre square and reverse coloring.  Again we surround the centre square with 1" strips, followed by 2" and 1 1/2" strips.  As we increase the number of surrounding strips, the potential for distorting the block increases.

Slice the blocks into quarters and make the switch of two quarters and we have an even more visually interesting block.


This week we will make 3 pairs of two contrasting blocks; slice, switch two quarters in the pair and sew the blocks back together for 6 - 8 1/2" blocks  for the quilt.

Download the instructions for Step 6 from the link below:

Scrap Basket 2 - Step 6


Saturday, 16 May 2020

Scrap Basket 2 - Step 5

Experiment, be curious!

What would happen if, ...... the geese square was not a single fabric block?

Using the four at once flying geese technique, we start with a large square, in this case a 5 1/2" square and four 3" smaller background squares.

When I designed this block over a year ago, I experimented with using three strips - one 3" x 5 1/2" rectangle and two 1 3/4" x 5 1/2" rectangles.  Sewing the two smaller rectangles on either side of the larger rectangle, the resulting 5 1/2" square is striped.

Follow the technique to the end and we have striped geese!  What was interesting was the combination of stripes both vertical and horizontal.  Makes sense given the technique, but nonetheless a surprising result.

This time I made the block, a new question.  What would happen if the background squares were two different fabrics?
Step 2

So, I chose two 3" squares of the same fabric in step 2 and chose two 3" squares of a second fabric for step 3.  The result was two sets of two identical geese with alternating background fabrics.

A happy surprise that would not have happened, had I not gave myself permission to be curious, to waste fabric had the outcome been a disaster.

To ensure your geese have "points", lay the 3" squares right sides together about 1/16" out from the corners of the 5 1/2" square.

This project is about experimenting, not worrying about the outcome,..... you might be surprised at the result.

Take time, be curious and most of all have fun!


Download the instructions for step 5 from the link below.


   Scrap Basket 2 - Step 5

Saturday, 9 May 2020

Scrap Basket 2 - Step 4


A twist on a simple postage stamp block.

Why make a simple postage stamp block when you can change it up with simple strip pieces and add some movement and color.

From your sorted scraps, dig out 1 1/2" strips of lights, mediums and darks and create 2 1/2" pieced squares that are a combination of:

* Light/Light
* Light/Medium
* Medium/Medium
* Medium/Dark
* Dark/Dark

By strip piecing the strips first a bit larger and then trimming them to size, you will have a more accurate 2 1/2" square to piece into your block.  See the pattern instructions for full details the piecing and numbers of each pieced block combination.

This block made larger would also be a great pillow top background for a collaged appliqué.

There are three pieced postage stamp blocks in the quilt.

If you are using 2 colorways, you will have 1 block of the first colorway and 2 of the second colorway.  If you are using 3 colorways, you will have 1 block of each colorway.

I hope this block warms up your creative soul on this chilly May weekend in Calgary.

"It's not about keeping busy, its about being at piece."

Download the instructions for Step 4 from the link below.

2. 

Scrap Basket 2 Step 4


Saturday, 2 May 2020

Scrap Basket 2 - Step 3


This 12 1/2" block expands our value play with crazy patchwork. There are three crazy patchwork blocks in the quilt.

Origins of crazy patchwork dates back to the mid to late 1800's.  This early patchwork combined irregular shapes, haphazard fabrics scrounged from uniforms, scraps from silk manufacturers, silk ribbons from cigars and clothing.  Surface embellishment of bead and meticulous embroidery covered these largely ornamental quilts.

To check out some of the historical crazy patchwork quilts, visit the International Quilt Museum website:   https://www.internationalquiltmuseum.org and search "crazy" in the patterns box under the Collections tab.  

Whilst the fabric was sourced in what would be described as frugal means, the surface embellishment was anything be frugal.

Crazy patchwork became be more utilitarian and much of the surface embellishment has all but disappeared.  Today's crazy pathway has evolved again; we now refer to this patchwork as the "made fabric" of Virginia Findlay Wolfe and the "slabs" of Cheryl Arkison.

What is really interesting is that we are now more frugal with our time and it is now a technique for dealing with an abundance of left over fabric.  A complete reversal of the block's early origins.

The challenge with this block is utilizing a value change between the irregular pieces to make a block that sparkles.  Without the value change, the block will become "muddy".

What is common to then and now, is the calming or soothing impact of piecing irregular pieces of fabric.

Download the instructions for Step 3 from the link below.

Scrap Basket Quilt 2 Step 3

Don’t forget to post your blocks on the Facebook Group “Modern Blended Quilts Virtual Show and Tell”.

Saturday, 25 April 2020

Scrap Basket 2 - Step 2


Gradients in value really shine with this block!

Take 8 different values of one color - rotating dark to light clockwise around the perimeter of the block and light to medium clockwise in the centre of this 8" finished block.

There are 6 blocks in the quilt (only 5 are shown in the photo).  

This block utilizes leftover 2 1/2" strips.  This is a simple block to construct.  The challenge is in the selection of fabrics with enough of a value change to show each quadrant of the block.

Lay out your fabrics on your work surface with a full strip showing when you are auditioning your fabrics.  Only when the full strips are visible will you see the value gradients that will be shown in the final block.

Take the time to audition your fabric choices with your phone before you start to cut and piece the block.  Our phones will detect those subtle value changes that may not be as visible to our eyes.

Take the value challenge!

Download the instructions for Step 2 from the link below.

Scrap Basket 2 Step 2

Saturday, 18 April 2020

Circle Sampler Month 5 - April 18, 2020


We had a great turnout for the demo on gentle curves.  After today, I hope everyone will approach these curves with enthusiasm and confidence.

Patterns for this month's blocks are available from Addies in Cochrane.

Attached below is the link to my PowerPoint slides from the demo.  The slides include the references for YouTube videos on gentle curved piecing and a book you may want to add to your library.

Don't forget the community links for Mask Makers YYC Facebook Group for details on making masks for our community.


I look forward to our next demo - Month 6, the final step of the Circle Sampler on Saturday, May 16th,  2020 at 11:00 am via Zoom.  After you have registered, look for the link to the meeting in your email.

Circle Sampler Month 5 Slides

Remember it's not about keeping busy, it's about being at "piece"!

Scrap Basket Quilt Along 2 - A New Scrap Project

With all our quilt production our scraps are multiplying like rabbits.  I'm running out of bins to gather up my scraps.  It's time for another scrap project, join in the journey!

It never seems to amaze me how well the scraps from many projects just blend together as they were intensionally purchased for the same quilt.  For this quilt I am using a monochromatic grey color palette and a monochromatic cream color palette.  

Consider using a monochromatic color palette in 2 - 3 colors.  

This quilt will include one Solid fabric per colorway to ground the design and bring together the various scrap fabrics.

The first step is to sort your scraps.  If your scraps are not sorted by color, the first step is to sort the scraps by color.

Once sorted by color the next step is to sort your scraps by value.


So here are "some" of my grey and cream scraps.    They look a little overwhelming.


Lets's take this chaos.....


And turn it into this!


Join the Quilt Along and tame your scrap piles.

The quilt will finish 60" x 72".  The quilt is constructed in blocks 6 - 24 1/2" square blocks and 6 - 12 1/2" square blocks.

We will explore block scales and monochromatic color palettes.


Download the instructions for Step 1 from the link below.

Scrap Basket Quilt 2 - Step 1

Feed your soul, take time to create,  It's not about keeping busy.  Its about being at "piece"!


Saturday, 4 April 2020

Scrap Basket Quilt Along - Step 5 Final Step

I'm spending more time in my studio, it is my happy place.

I am working on a number of projects, from finishing up UFOs to my upcoming demo project and filling it in with my Scrap Basket Quilt for leaders and enders.

Why use leaders and enders?  Again it goes back to ensuring we have that elusive 1/4" seam.


Without a leader, we often have tangled threads at the back of our blocks at the beginning.  These tangled threads can also result in a change in the tension of our stitches.

Without an ender, we often tend to have our stitches veer off to the right at the end of our blocks.  This can make joining together seams between blocks more difficult.

The added benefit of leaders and enders project is also saving thread which would otherwise be wasted on a "pig" or "bunny tail".

Just think about being able to complete a second project as part of your primary project.

I always have testers for my patterns.  I am grateful for all the help of my pattern testers - some are even so keen, that they work from a picture of a quilt and then take a look at the written pattern.


As everyone's fabric choices have been different, so every quilt will be different.  As you finish your quilt, don't forget to post your quilt on the Facebook Group - Modern Blended Quilts Virtual Show and Tell.

If you are not a member of this Facebook Group, sign up today.

Linda, has been really keen on this project and has already quilted and bound her Scrap Basket Quilt.  Linda's chosen solid is the lighter teal fabric.

Additionally, Linda has incorporated a signature print throughout the quilt and in her binding.

Linda quilted the vertical rows of the quilt with different quilting motifs.  The final result is just stunning!


So, finally is the schematic of the entire quilt.  It really is a "happy quilt".


Download the instructions for Step 5 from the link below:

Scrap Basket Quilt Along - Step 5 Final Step

Stay tuned for the next quilt along - details will be posted on Instagram and Facebook.

Feed your soul, take time to create.  It's not about keeping busy, it's about being at "piece"!


Wednesday, 1 April 2020

Circle Sampler Demo - Month 4

Today I hosted my Circle Sampler Demo on line with Zoom.

It was great to connect with our quilting community in a very interactive way.  I hope everyone on line enjoyed the online demo as much as I did!


Here are two of the blocks we discussed at our demo.

Color can be the one thing that can make or break a quilt design.  On our interactive call today we explored the concept of "Relative Color".

Joseph Albers in his "Interaction of Color",  states "Color is the most relative medium of art". Through experimentation, you will discover certain colors are susceptive to change when placed on a background of different colors.

If you would like a copy of the pattern for month 4 - please reach out to Addies Creative Fabrics at 2addies@gmail.com

Attached below is the link to the PowerPoint slides from the presentation.

  Circle Sampler Month 4 Demo - Powerpoint slides

"Feed your soul, take time to create.  It's not about keeping busy, it's about being at peace ("piece")!

Monday, 23 March 2020

Barricade - New Pattern Launch

Inspiration for a quilt often comes from the simplest of things around us.


My Barricade pattern was from one of those simple things - a roadway barricade at the Biltmore Hotel in Scottsdale, Arizona.

I had wanted to go to the Biltmore Hotel for several years now - I had to see the stained glass window Frank Lloyd Wright called "Saguaro".

On the visit to the hotel, my cellphone camera was working overtime.  The architecture inside and outside of the hotel is stunning.

Everywhere I looked I saw rectangles, rectangles and more  rectangles.  I finally used my cell phone to measure one of the blocks of the hotel - it was 2 cellphones high by 3 cellphones wide.

Hasn't everyone measured something in "cellphones''.

Oddly enough, I was so mesmerized by my surroundings, I almost missed the stained glass window.

The window is described as a stained glass window, but not in the sense of a true leaded stain glass window.

It is more like pieces of glass glued/affixed to a flat piece of glass. The window is located in a dark room, so it is hard to get a good picture of it.  I am disappointed with my picture of the window

The furniture, light fixtures, railings and doors in the hotel are all Art Deco and would be described as pieces of art.


When I stopped to take a picture of this barricade, Bruce (my husband), thought I had lost it.

On to the pattern,.....

Barricade was designed to use those special larger prints that we can never resist buying only to find you don't want to cut them up into small pieces.


There are two different larger print fabrics in this quilt.  The fabrics in my cover quilt were found by my quilt buddy, Armiel, on one of her many quilt shopping tours.  You know the ones - you get a text with a picture and caption that says "How many meters am I buying for you?"  I am eternally grateful for these texts and look forward to receiving many more!

The blocks are rectangles.  When I was making the cover quilt, I had four blocks left over - I'll make a pillow!  That thought translated into an alternate layout for the quilt.

The pattern has a baby, lap and queen sized quilt for the alternate block layout above and a baby and lap sized quilt for the big block layout.


Ask for Barricade at your local quilt shop.  Quilt shop owners,  can order the pattern from my distributor - Erie Quilt Art in Calgary, AB.

So dig out those larger print fabrics you have in your stash or the ones you have been eying in your local quilt shop and make a Barricade quilt for that someone special.


Saturday, 21 March 2020

Scrap Basket Quilt Along - Step 4

From my last post on, "That Elusive 1/4" Seam" you could read between the lines and see that I was working on Step 4 at that time.

There are several things that can impact the accuracy of our 1/4" seam allowance.  Things like:


  • the sewing machine you are sewing on, where you are switching between machines
  • the accuracy of your pressing and
  • the type of thread you are using.  
As I have already posted about differences between sewing machines, let's move on to accuracy of your pressing.

In Step 4 you will be pressing your seam allowances open to eliminate the bulk when sewing the rows together.

It is far easier to press the seams open on this row than to force the seam allowances in another direction on the other rows where you have the HST's.

I use a pressing stick when I am pressing seam allowances open.  The stick's curved surface ensures there are no extra folds of fabric on the right side of the fabric on either side of the seam.  

I don't press with out a stick.  I carry a smaller 10" in my notions bag for when I am away from my studio.

The weight of your thread when piecing can also impact the size of your blocks.  I use So Fine by Superior Threads to piece.  This thread is a 50 wt polyester thread.  The heavier your thread (ie: a smaller number) the more fabric will be taken up when it passes over top of the seam, making the block smaller.

Recently when I was in Mesa, I was using Bottom Line, another Superior Thread.  It is a 60 wt polyester. With this finer thread I noticed a difference; there was less fabric being taken up when it passed over top of the seam, making my blocks larger.

My words of advice this week, take the time to follow the process of checking the size of the joined 2 1/2" squares in this step.  You don't want to get to the end of piecing a row with 32 squares only to find the row measures 1/2 - 1" longer or shorter than 64 1/2".

Trust me on this one.

Enjoy this step and don't forget to post your Step 4 on the Facebook Group - Modern Blended Quilts - Virtual Show and Tell or on Instagram using the hashtag #scrapbasketquiltalong.

Download the instructions for Step 4 from the link below:


Saturday, 7 March 2020

Scrap Basket Quilt Along - Step 3


That Elusive 1/4" Seam
That perfect 1/4" seam, we often take it granted.  It does make a difference!

A dear friend of mine has often said, she always sews a complete project on the same sewing machine.  I thought it shouldn't make a difference, but yes it does.

Alas, 1/4" feet are not all the same from machine to machine, especially when you are sewing on different brands of sewing machines.

I started my Scrap Basket Sampler on my newer Pfaff machine.  It has an adjustable needle position that moves in small increments.  This is a valuable feature.  My classroom machine at home is also a Pfaff with the same adjustable needle feature.  At home when I am switching between machines, I know the adjustments for each machine to get that perfect 1/4" seam.

But alas at my vacation home, I have an inexpensive Brother machine that I thought didn't have an adjustable needle position that moved in small increments.  Read the manual Susan!  Depending on the choice of two straight stitches, yes it does have the same feature.  I had been merrily sewing along  assuming that I couldn't adjust the needle position in small increments.  I have owned this machine for over 5 years and only found this feature this past week.

As a result, I had to resew, 32 - 2 1/2" squares into a long strip to get the correct length for a row of my quilt.  Lesson learned, know your sewing machine.

On to Step 3!

This step hints at the overall design of the quilt and starts to show the movement in this quilt.

Ghosting, It can be a Problem
As I have been working with some lighter fabrics, the instructions for the strip sets have you pressing the seam allowances open.

Ghosting can be a real problem.  Ghosting is when the seam allowances of a darker adjacent fabric show through to the right side of a lighter fabric.  By pressing the seam allowances open, it is only the seam allowance from the same fabric that shows through to the right side.  In my quilt, I have been using precuts of Pond fabric by Elizabeth Hartman.  What is surprising in this line of fabric has several light fabrics and a white on black print - a real nightmare for Ghosting.

Additionally, with the HSTs, we end up with a lot of bulk at some points in this quilt.  By pressing the seam allowances open, we reduce the amount of bulk where the strip sets meet the HSTs.

"Natural Direction" for Pressing Seam Allowances
 It's often easier to press seam allowances in one direction than another direction.

A good example of this is when you are sewing the 6 1/2" x 2 1/2" joined HSTs to the 6 1/2" x 4 1/2" or 6 1/2" x 16 1/2"strip sets in steps 7 and 8.  The seams just want to be pressed towards the strip sets.  The diagonal seams in the joined HSTs create more bulk as compared to the strip sets with the open pressed seams.

So, do press the seams towards the strip sets.

A rule of thumb that I use, press towards the block or unit with the fewest seams.

Enjoy this step and don't forget to post your step 3 on the Facebook Group - Modern Blended Quilts - Virtual and Tell or Instagram using the hashtag #scrapbasketquiltalong.

Download the instructions for Step 3 from the link below:

Scrap Basket Quilt Along Step 3


Saturday, 15 February 2020

Scrap Basket Quilt Along - Step 2

Wow, that was a lot of HSTs to make in our first step, but it will be worth it!  In this step we will use 72 HSTs in the construction of 3 vertical Row A's.  Let's get started.

In Row A we have 3 units of 8 HSTs sewn together 2 HSTs wide by 8 HSTs tall.  It is easier to accurately piece units if the vertical seams of the HSTs nest when the HSTs are placed right sides together.

Let's look at the photograph below.


In the First Step of the Quilt along, the seam allowances of  HST were pressed towards the darker fabric.

In the layout at left, the HSTs have been placed to form two scrappy flying geese.

I have found my piecing accuracy for this block is best when I sew the horizontal seams between the top and bottom HSTs first.

After flipping the top HSTs on right sides together on the bottom HST, the diagonal seams need to nest.  The nested seams will lock together preventing the blocks from slipping out of position when sewing.  I often even press the nested blocks to further lock the blocks together.


If your seams will not nest with your desired layout, take the time to repress the seam allowances to ensure they will nest.

See the photo at right to see the nested seams.

To ensure I don't flip a block when I get to my sewing machine, I pin the side of the block which I am sewing.  This small step prevents a lot of "unsewing".

I like to use "leaders and enders" (blocks from a second quilt I am sewing) or piece of fabric at a start of a series of chain pieced blocks.

Not only do the leaders and enders prevent the corners of a block from being forced down into the throat plate of your sewing machine, but it also prevents sewing a seam that veers off an accurate 1/4" seam.


Once the two horizontal seams are sewn and pressed the joined geese are sewn together along the vertical.   See more details in the instructions.  

Download the instructions for Step 2 from the link below:

Scrap Basket Quilt Along - Step 2

Happy sewing this weekend!


Saturday, 1 February 2020

Scrap Basket Quilt Along - Step 1

I've been busy cutting my solid and scraps for the quilt along, all done!

Now on to Step 1.  Included in the quilt are a number of half square triangles ("HST's").

Here are some of my finished HSTs, aren't they pretty?


When I first started quilting, HST were not my favourite quilting block.  I was always so disappointed when I lost the points on the corners of the block.


What I didn't realize at the time was that I had not set myself up for success in the first place!


I was initially taught to:
  •  cut two 2 7/8" squares, 
  • draw a line from one corner to the opposite diagonal on the reverse of one square,
  • place the two squares right sides together
  • stitch a seam 1/4" on either side of the drawn line,
  • cut the block apart on the drawn line,
  • press to set the seams, and open the blocks and press the seam allowance towards the darker fabric square and 
  • you should end up with two - 2 1/2" HST which when sewn into a quilt should be 2" finished.
The technique above didn't set me up for success.  The finished blocks didn't always measure 2" and often I had cut off the points of the block.

Later in my quilting life, I was introduced to Studio 180 Design tools.  Thank you Gail!

Using these tools the method changed, I now:
  • cut two 3" squares,
  • line up the laser line my Magic Wand from one corner to the opposite diagonal on the reverse of one square and draw a line on either side of the Magic Wand
  • place the two squares right sides together
  • stitch a seam on each of the drawn lines,
  • cut the block apart in between the on the drawn lines,
  • press to set the seams, and open the blocks and press the seam allowance towards the darker fabric square,
  • press to set the seams, and open the blocks and press the seam allowance towards the darker fabric square,
  • trim the blocks to 2 1/2" finished using my Tucker Trimmer and
  • I did end up with two accurate 2 1/2" HSTs.

The accuracy of my blocks improved because:
  • it is easier to cut a 3" square
  • it is easier to stitch a straight line when you are stitching on a drawn line and
  • it is easier to end up with an accurate 2 1/2" HST if you a trimming down a larger block.  

The technique becomes even better when you can make 8 HSTs at the same time by starting with two 6" squares. 


With the eight at once technique you draw 4 lines - 2 lines on either side of my Magic Wand placed diagonally on the square, and 2 more lines on either side of my Magic Wand placed on the other diagonal on the square.


Stitch on all four drawn lines and then cut the block apart.  Press the blocks and trim all 8 blocks to 2 1/2" using the Tucker Trimmer.

The Magic Wand and Tucker Trimmer are essential tools in my quilting bag.  You can ask for the Magic Wand and Tucker Trimmer at your local quilt shop.


For complete details of this technique and the HSTs to make for Step 1 of the  Scrap Basket Quilt Along.

Download the instructions from the link below.


Don't forget to post your progress on Instagram or Facebook using the hashtag 

#scrapbasketquiltalong

I'm looking forward to seeing everyone's progress!

Happy quilting!

Stay tuned for Step 2 on February 15th, 2020.

Saturday, 18 January 2020

Scrap Basket Destash Complementary Quilt Along

Are your scraps over flowing their containers and taking over your studio space?  If yes, join me for my Scrap Basket Destash Quilt Along.

On the 1st and 3rd Saturday of the month I will be posting the instructions for one step of this project on my blog.

Follow me @modernblendedquilts on Instagram and my Facebook page, Modern Blended Quilts to receive notifications of the posting new step for this project.  If you would prefer an email notification for the post, enter your email address on this blog.

There is no pattern to purchase, all instructions are complementary can be downloaded from this blog in the link below.

With the exception of your choice for a Solid fabric, the goal for this project is to be a scrap basket destash project.  You will need 1.25 meters of Solid fabric for the quilt top and binding.  You might even have the perfect Solid fabric in your stash!

The construction of this quilt is ideal for a "longer length" leaders and enders project.  Cut out the project and construct it as you chain piece your current quilt project - thus eliminating threat waste on a fabric "pig" or "bunny tail.

As you are working through the steps, be sure to tag your posts on Instagram and Facebook #scrapbasketquiltalong.


Join the journey and download the cutting instructions for this project.

Scrap Basket Quilt Along Introduction

Here is a subset of my fabric choices, my solid is Kona Wasabi.